How to make your own chalk
DIY chalk – It is no secret that kids love to play in the outdoors during summer. As a parent, you want to find some fun and safe activities for them to do while they are out there. If you are a bit short on ideas, I just might have a good one for you.
You may have a lot of boring gray cement in your backyard or driveway and your children would enjoy spending some time using it as a canvas for their chalk artwork. But, before you even get them started, how about you show them how to make their own liquid chalk?
Making liquid chalk is a fun (if not a bit messy) project. I suggest you don’t do this indoors as the concoction can stain your carpet tile.
Here’s everything you need:
- Water
- Flour
- Paint brushes
- Food coloring (various colors)
- Containers
Once you have those together, all you have to do is follow these simple directions:
Step 1
Pour half a cup of water into one of the containers. Then think about how thick you want the liquid chalk to be. If you want it fairly thick, add half a cup of flour as well; if not, one-fourth of a cup will be enough.
Step 2
Add about 12 drops of your favorite color food coloring. At first, try just one color per container so that the colors come out clearly defined. Stir all this until you have a smooth paste without any lumps.
Step 3
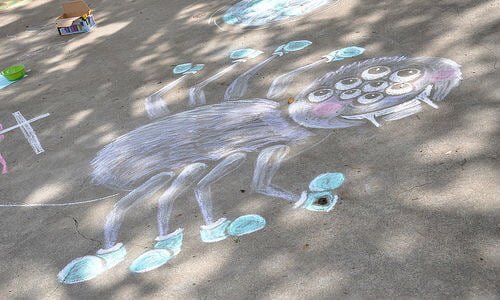
Paint! Let your kids unleash their creative instincts on the pavement. Once liquid chalk dries up, it looks just as though you’d been painting with regular chalk.
Also, like regular chalk, it will wash right off with a hose. But, before you do that, make sure to take pictures of the creations that will come to life on concrete.