DIY Toothbrush Bracelet
Toothbrush Bracelet
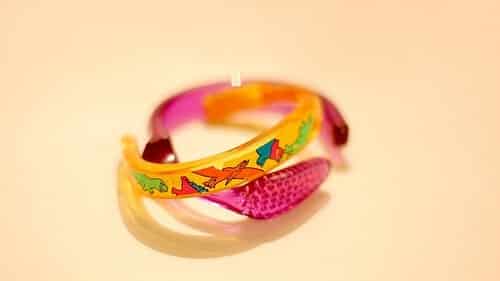
Today we’ve got a craft that is sure to be an absolute hit with younger kids and older hipsters alike, but do be aware that it may require some supervision for children. We’re going to be making our very own tooth brush bracelets! What exactly is a toothbrush bracelet? Well its nothing but an old (or new) tooth brush that you’ve converted to a fun and wearable craft – incidentally these also make for a great wedding gag gift! For this project we recommend looking around for a kids style toothbrush with a clear and colored handle as opposed to the more generic white toothbrushes. You’ll also want to use a toothbrush with a flat rather than circular design as this will make the process easier – now let’s get to it!
What You’ll Need
- A colorful flat handled toothbrush
- Pliers
- A pot and stove
What To Do
Start by bringing some water to a boil in your pot. Go ahead and throw in the toothbrush into the boiling water for a few minutes before removing it. Using your pliers, you should now be able to make short work of the bristles. Pull them all out, including the metal bracers that hold them in place – now we’re really ready to get to work!
Throw the de-bristled toothbrush back into the boiling water for a while longer until it becomes soft and pliable. Once it reaches this point you’ll be able to take the soft tooth brush and mold it to the shape and width of your arm or wrist. If you’re worried about burning your arm, you can always use something like a steel necklace extender lobster claw instead. The plastic of the handle will cool quickly, so you’ll likely need a few more dips in the hot water to really get the right shape. Don’t worry about that though, just keep reheating the plastic and molding it to your arm until you’ve reached the desired shape and ta da! Just be very careful not to burn yourself with all this boiling water.