DIY luggage tags
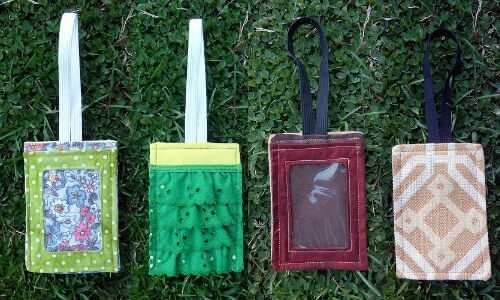
As winter draws to an end, the travel season will soon begin. With luggage looking more alike than ever, it is often hard to distinguish your bags from others and vice versa. For those in the crafty mood there is a simple solution to making your bag stand out: DIY luggage tags. Quick and easy to make, custom clear plastic luggage tags are a fun and decorative way to put your own spin on your bags, while allowing you to swiftly find your bags amongst the sea of luggage at the baggage claim.
The items you’ll need:
- two 4”x4” of a medium to heavy fabric
- two 4”x4” fusible interfacing
- one 3”x3” clear vinyl
- 8” to 10” cord of your choosing
- iron
- scissors
- sewing machine
How to put it together:
1. Iron the interfacing on the “wrong side” of the fabric and sew them together leaving on side open. The interfacing gives the fabric structure and strength, which is important for a luggage tag that may experience rough handling.
2. Insert the cords ends into the open side and sew shut.
3. Place the clear vinyl on the fabric square and sew three of the sides leaving the side wear the cord is attached open. If your sewing machine cannot glide over the vinyl simply place some tissue over it when sewing.
4. Create a card with your address and information, slide it into the vinyl pocket, and your new luggage tag is ready for use!
Make it fun and create a customized tag for each piece of luggage you have!