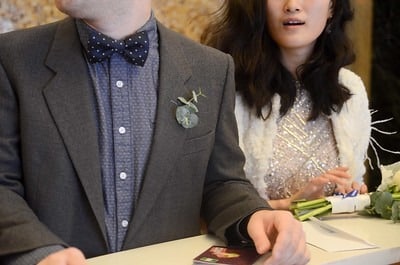
DIY Bowties
Today we’ve got another fun and easy crafting project that you’ll be able to wear and show off and do
Continue readingadana escort, bursa escort, ankara escort, bursa escort, mersin escort, gaziantep escort, gaziantep escort, gaziantep escort, görükle escort, izmit escort, pendik escort, pendik escort, bursa escort, bakırköy escort, 1xbet giriş, tjk canlı, at yarışı sonuçları, yeni giriş, mobil giriş, casino giriş, rulet giriş, slot giriş, bet giriş, deneme bonusu, bonus veren bahis siteler, güvenilir bahis siteleri, pin up giriş, cratosroyalbet giriş, bets10 giriş, setrabet giriş, betebet giriş, marlabet giriş, tümbet giriş, matbet giriş, dinamobet giriş, betcup giriş, betpark giriş, vevobahis giriş, pasacasino giriş, meritking giriş, bwin giriş, marlabet giriş, casinolevant giriş, bahisnow giriş, bahisnow giriş, kulisbet giriş, bahislion giriş, betsmove giriş, paribahis giriş, mobil bahis, grandpashabet giriş dumanbet, dumanbet, dumanbet, dumanbet, dumanbet betturkey, betturkey, betturkey, betturkey, betturkey, casibom giriş, casibom giriş, casibom giriş, casibom giriş, jojobet giriş, jojobet giriş, jojobet giriş, jojobet giriş
Today we’ve got another fun and easy crafting project that you’ll be able to wear and show off and do
Continue readingYou can use all sorts of scrapping materials to help create the perfect wind chime. You can also incorporate
Continue reading
Easy DIY sock puppet We live in a day and age where kids would rather spend hours gaming on their
Continue reading
DIY side table Need a creative small table to for your room or patio? If you are looking for a
Continue reading
Many people are using do it yourself ideas as a way to save money, especially when it comes to weddings.
Continue reading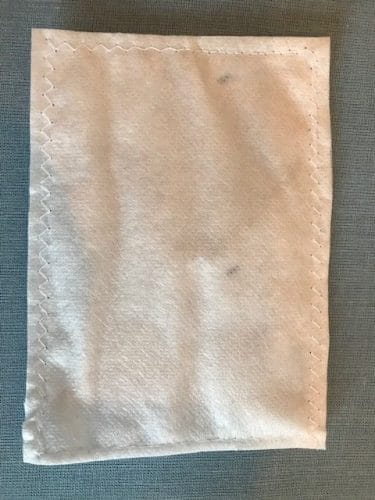
This article will show you how to make filters out of vacuum cleaner bags to improve your homemade facemask. How
Continue reading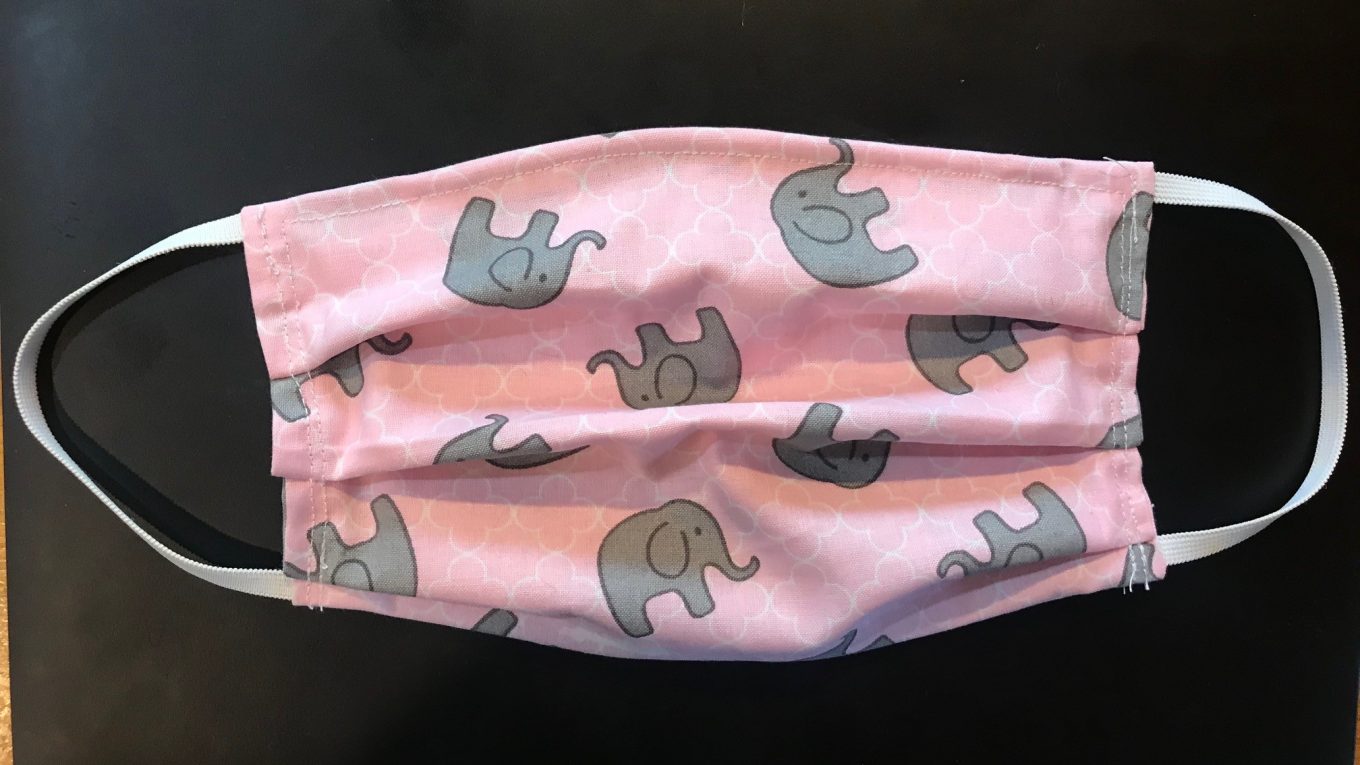
Wearing a homemade facemask is mandatory in some states and desired by many to help prevent the spread of the
Continue readingWomen love surprises! Love and nice gifts can make your mom, best friend, girlfriend or wife happy on their special
Continue reading